In this article, you’ll learn how to record your first sale. Let’s get right to it without any ado!😁
Step 1: Adding Transaction Details:
You can begin your transaction journey in two ways.
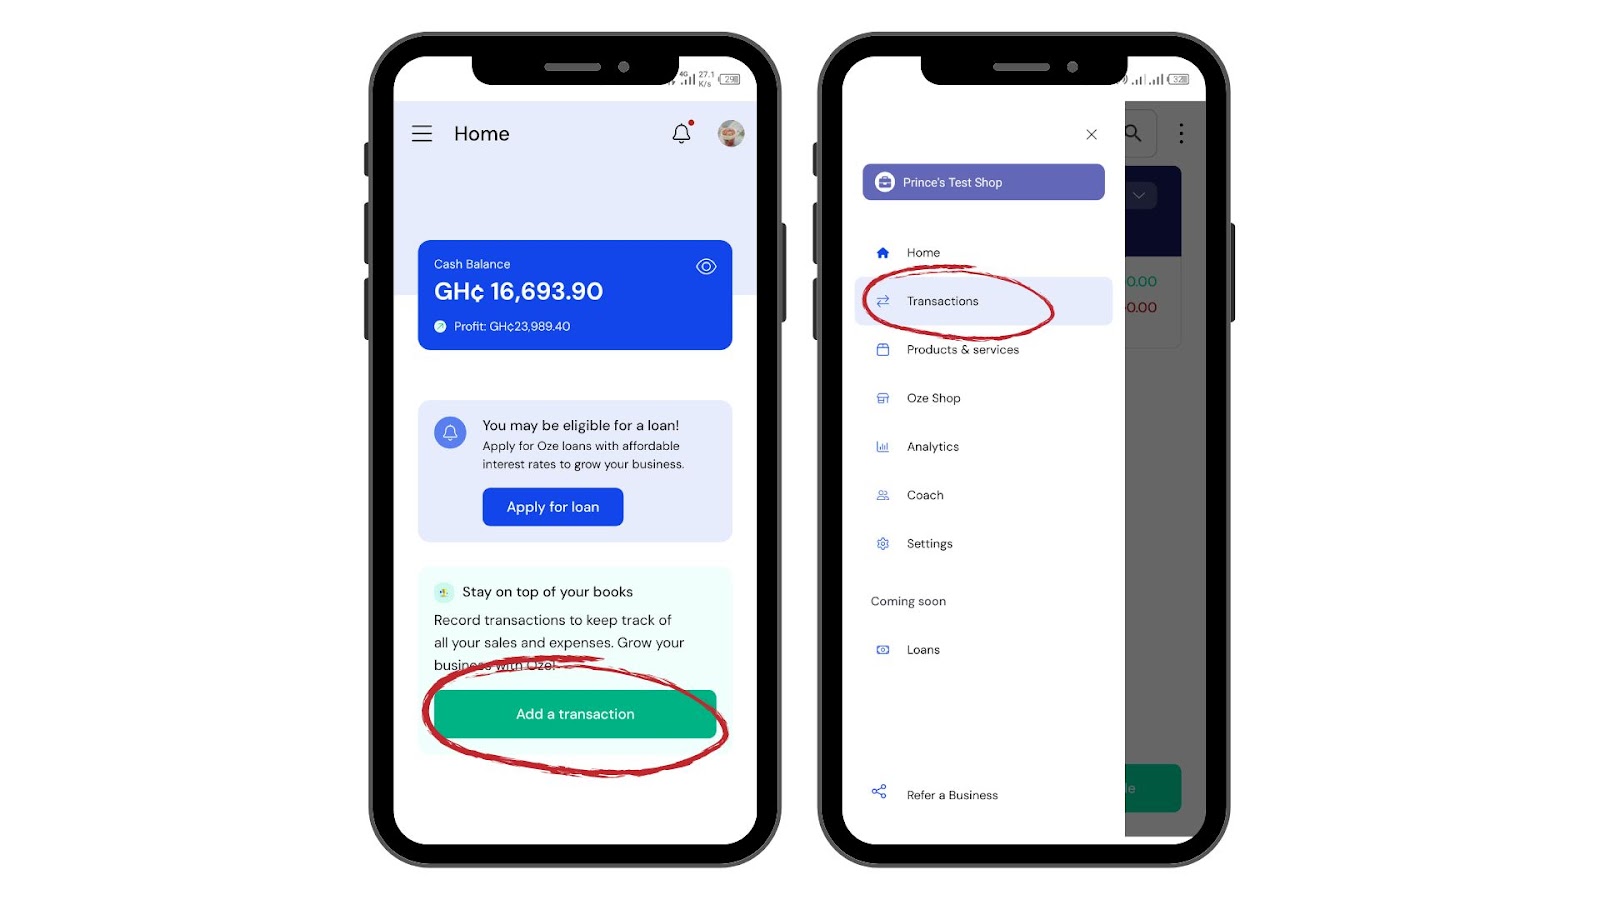
- Adding a Transaction From the Home Screen:
- Simply tap the “Add a transaction” button on the home page (image below).
- Adding a Transaction from the Side Menu:
- Adding a Transaction from the Side Menu
- You can go ahead to expand the side menu and select “Transactions”.
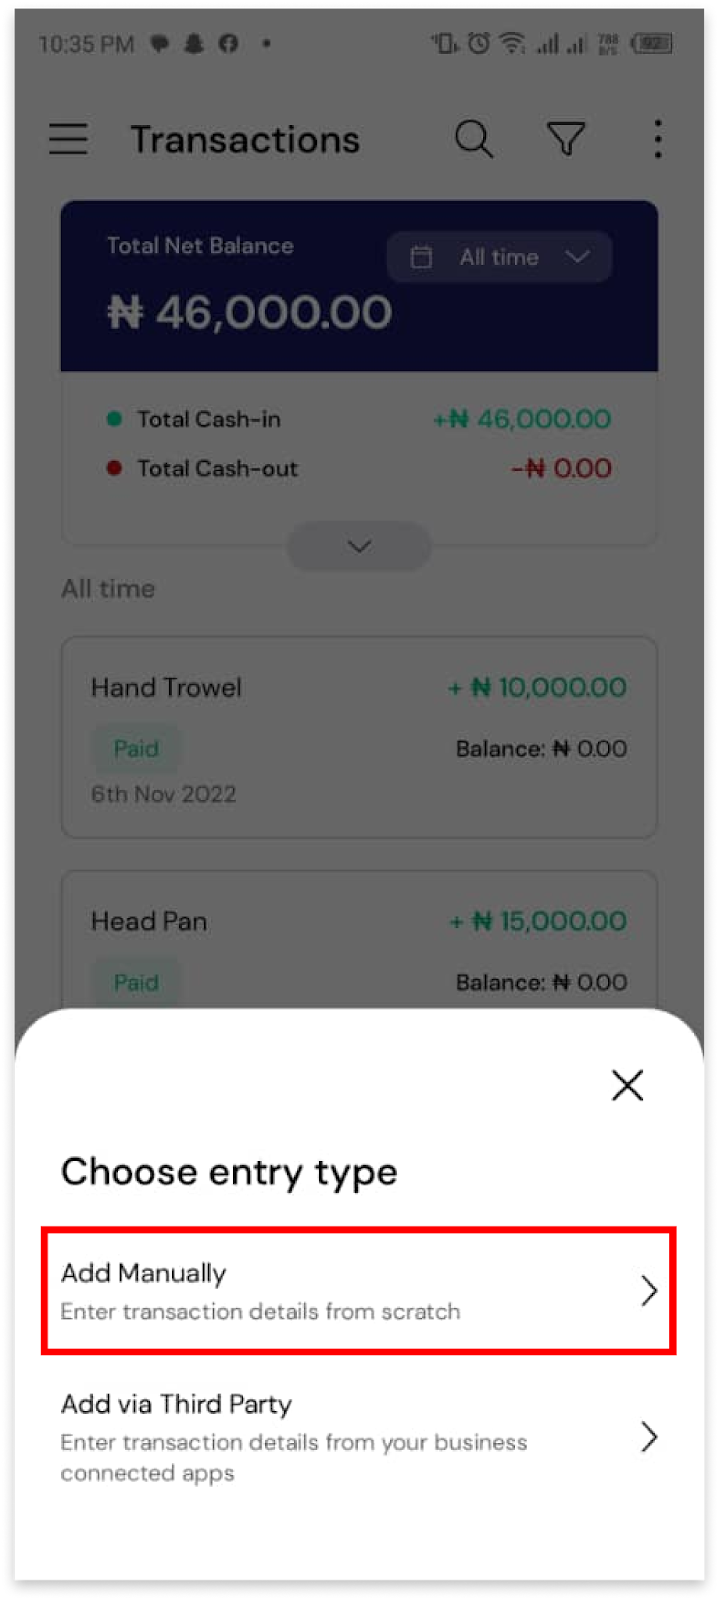
On the next screen, you would be asked to “Choose entry type”. Here, you can add manually or add via a third party. For the sake of this tutorial, we will add manually.
Step 2: Creating a New Item
Since this is your first time recording this item as a sale, you will need to add the item as a new item and as a result.

Create a new category for it. Once done, tap the “Create Item” button.
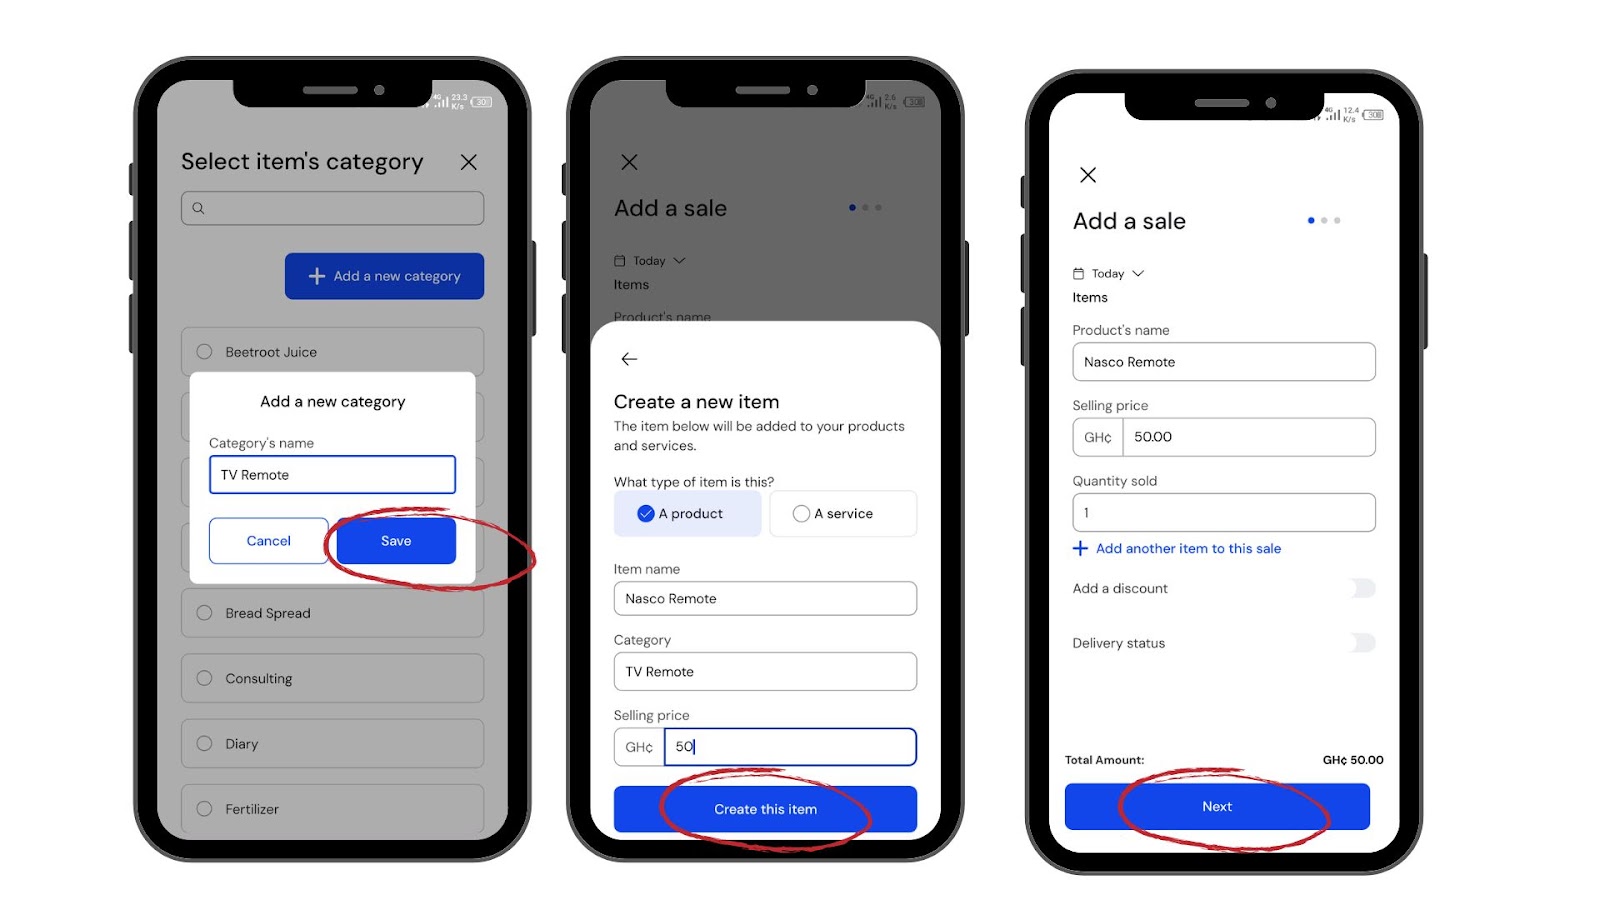
Now, enter your unit price and quantity and tab on NEXT.
Step 3: Adding Payment Details to Transactions
To begin, select the payment status of this transaction whether it is Paid, Partially Paid or Unpaid.
Enter all the payment information such as amount paid, payment method and balance due date (if applicable).
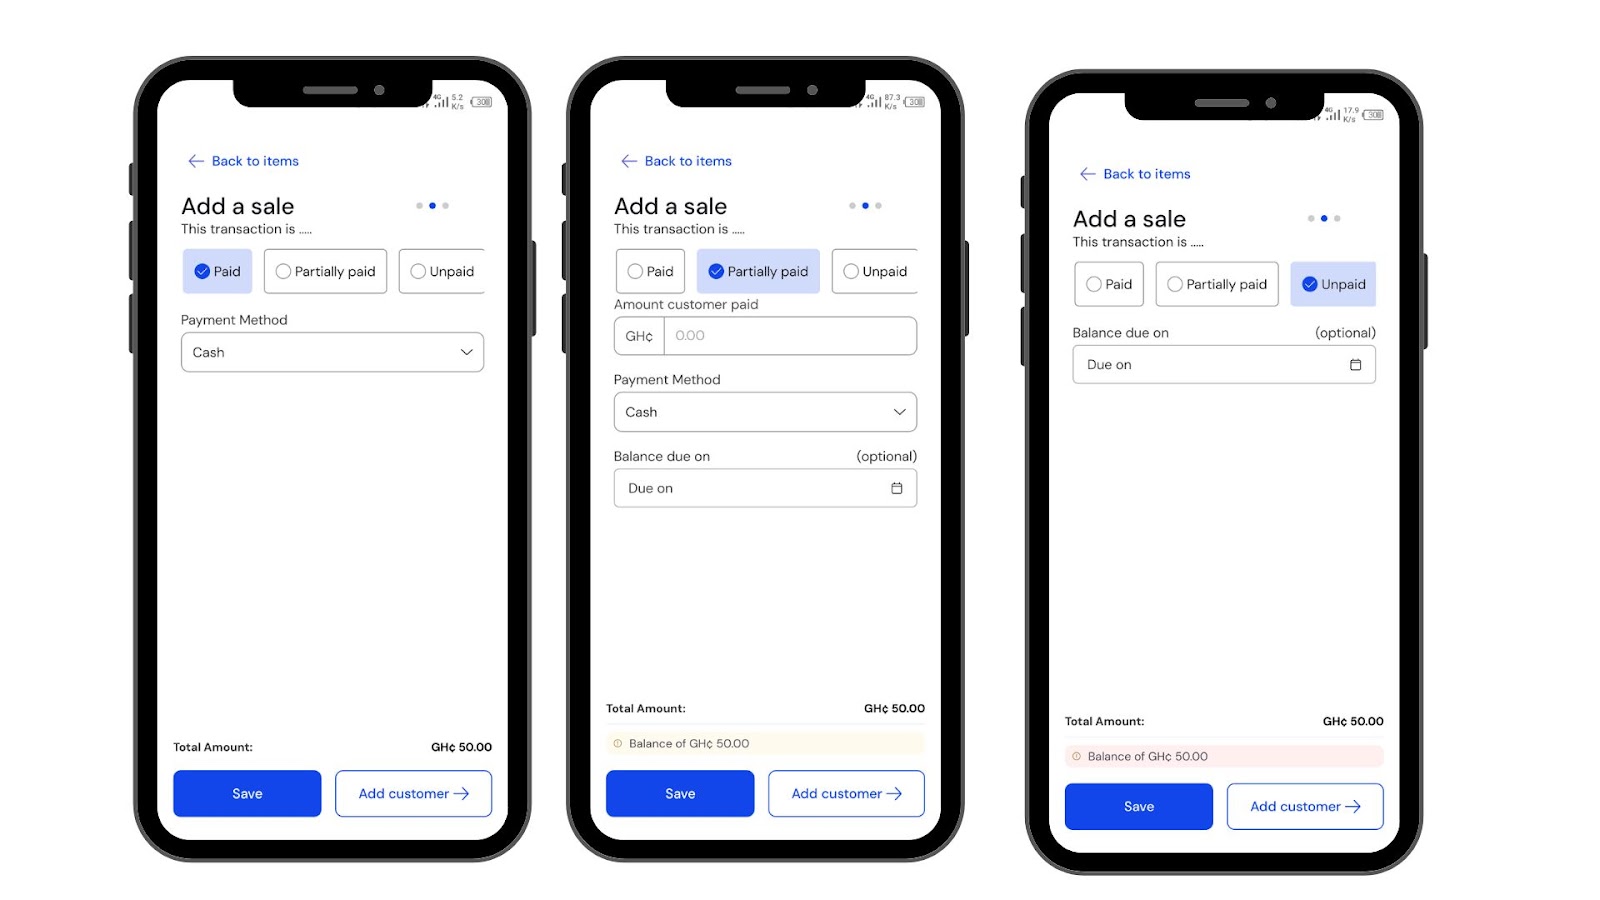
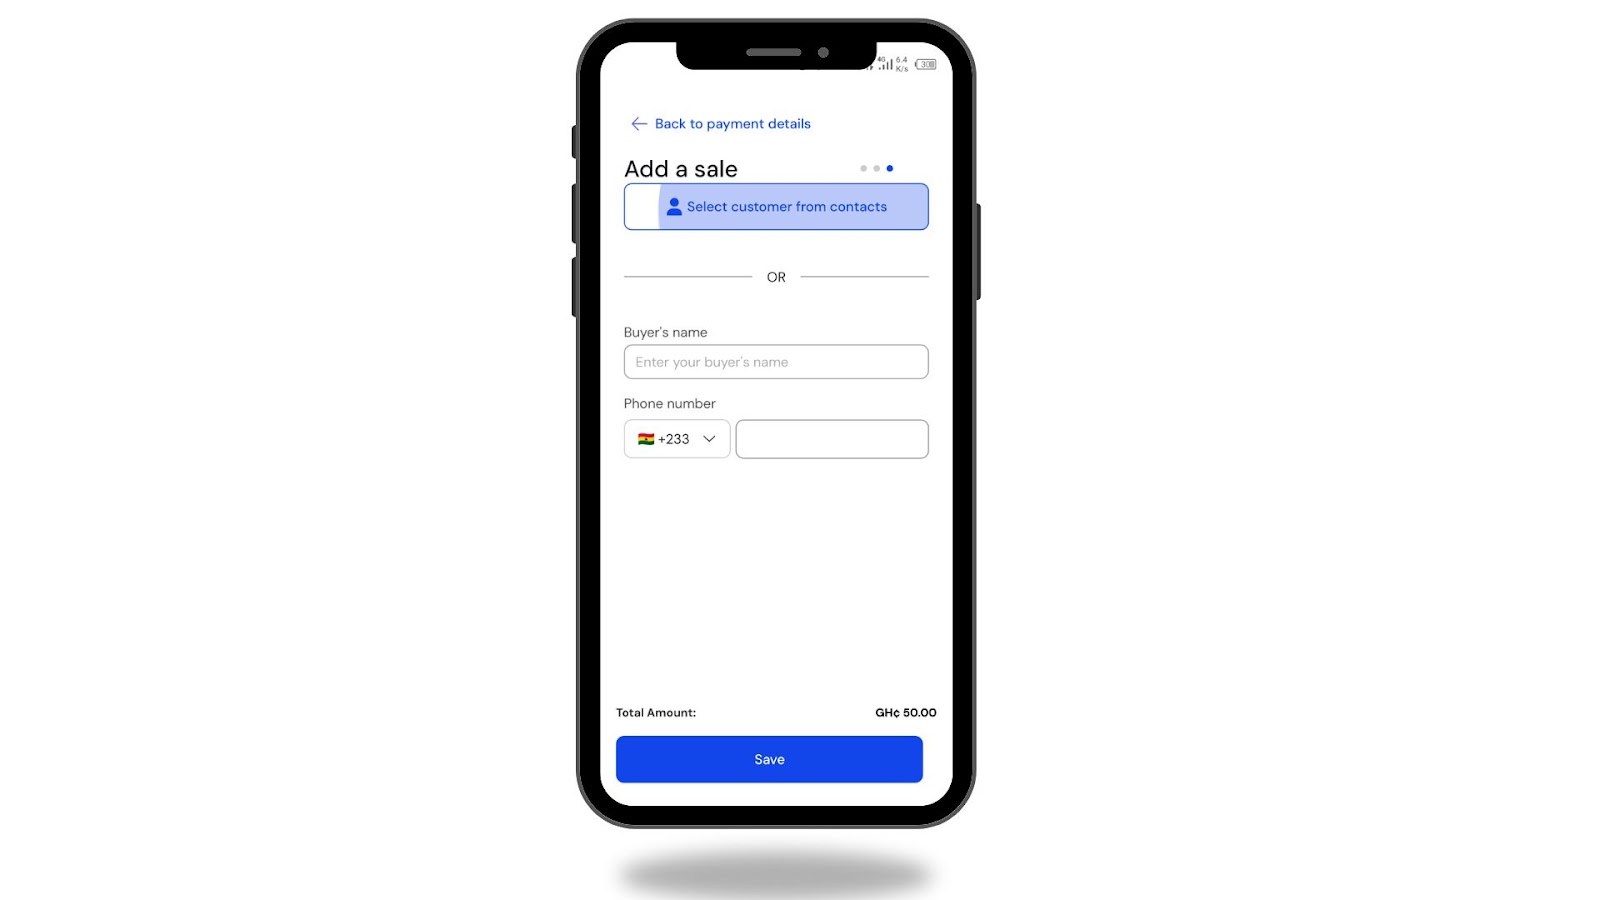
Next, tap the “Add customer” button shown in the picture below to complete the final step.
Provide information about your customer. I.e. Name and phone number.